Now that you’re a pro at creating To-Do Lists, tagging the lists (and anything in your notebooks, for that matter) can help you create MORE lists. I’m a list fan, can you tell?
We’ve already used the “To Do Tag,” but OneNote has many more options.
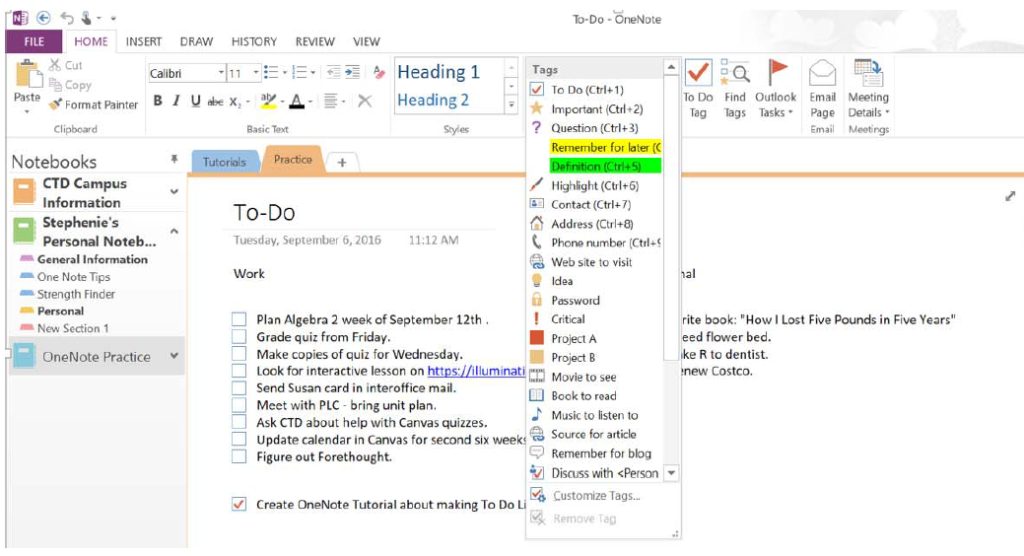
Choose the drop-down menu above “Tags.”

This gives you a variety of tags to choose from.

I chose “Web site to visit.”

Continue to tag at will.

As your notebooks begin to grow, tagging will help you find information much faster.
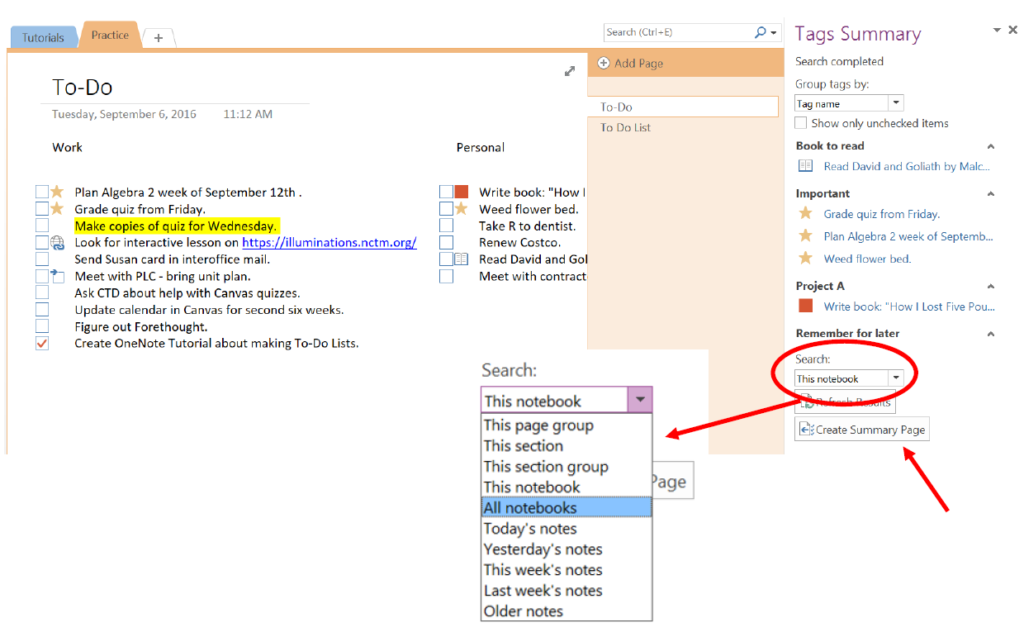
To utilize this tagging feature, click Find Tags.

The Tags Summary menu pops up on the right with several options. For this tutorial, we can leave most of the options at their default. Changing the “Search” option, however, may be something to consider at this point.

The drop-down options provide you with the ability to search a variety of places. If you are a prolific OneNote user and have multiple notebooks, you may choose the “All notebooks” option. I will search in “This notebook” and click “Create Summary Page.”

The default name of the page is whatever tag name is listed first. You can rename the page by typing on top of the date.
